Gutters and drainage
How to connect a rainwater gully to a downpipe
In brief
A silt trap captures some leaves and sediment, but it does not replace a correctly designed drainage system as a whole. Before buying, check the diameter and shape of the downpipe and the outflow pipe, as well as the flow direction and access to the basket once the pipe is connected. Set the cover height relative to the finished surface, not the temporary ground, and choose a model with a load capacity suited to the installation location. The connection to the pipes should be stable and stress-free. After installation, carry out a flow test and observe the entire drainage run.
What function does a rainwater gully serve?
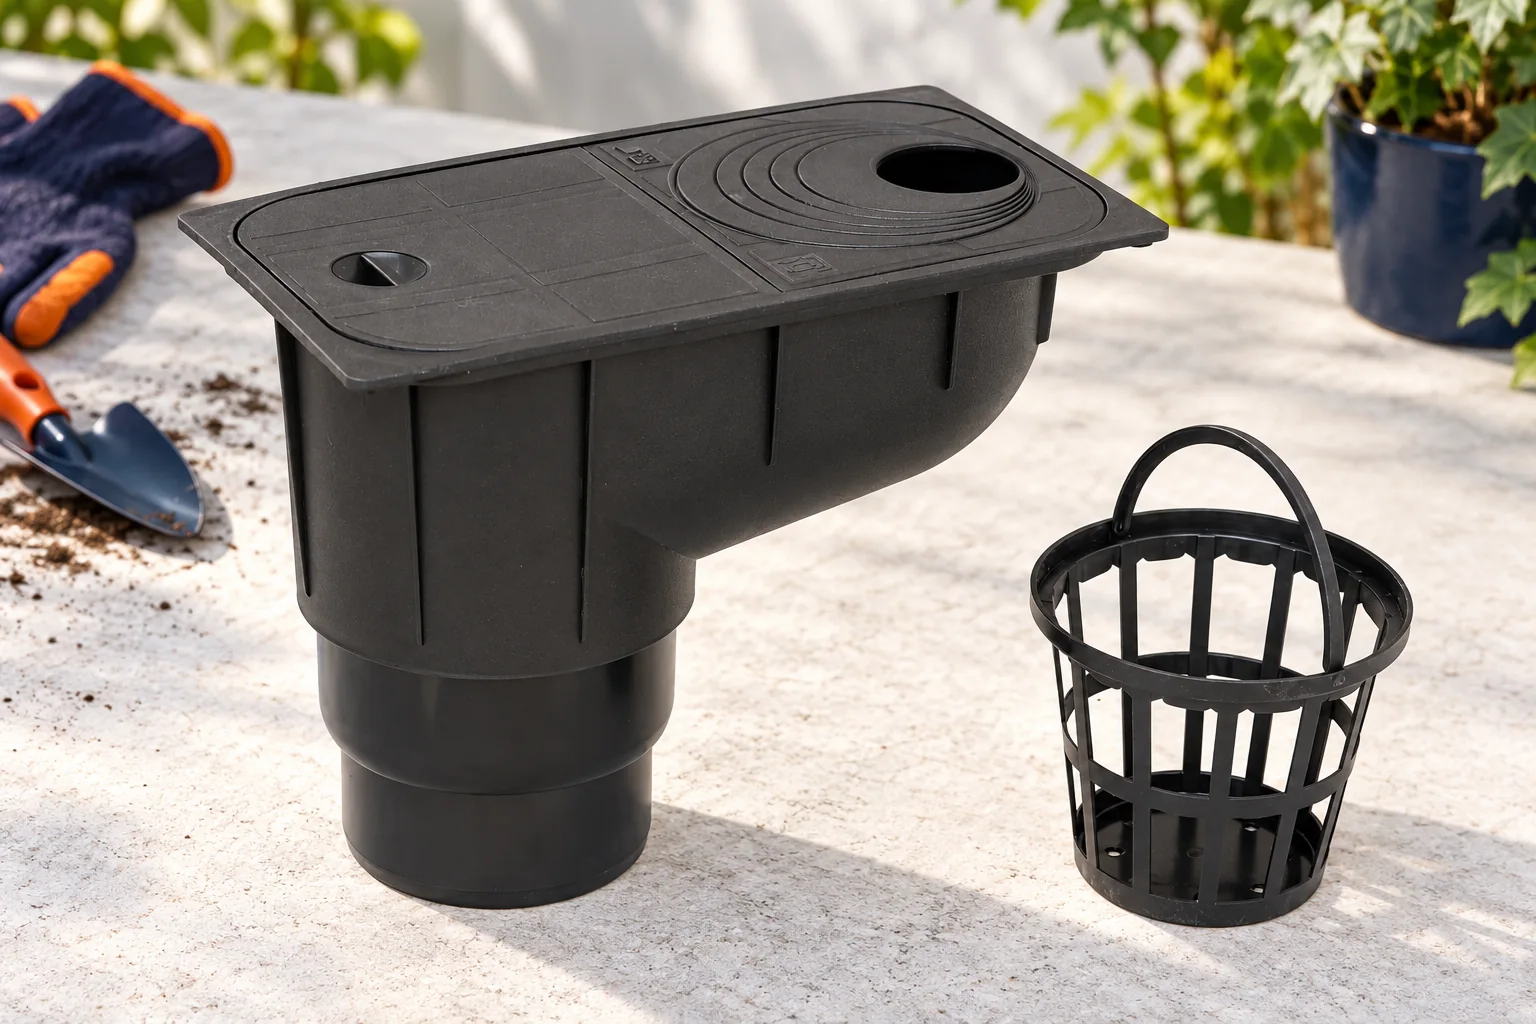
Water from the downpipe carries leaves, sand and small fragments of sediment from the roof. The rainwater gully provides a space where some of this debris can be retained and removed. In many designs a removable basket serves this purpose. Thanks to the inspection cover, access is easier than dismantling the pipe. However, this does not mean that all fine particles are retained, nor that there is no need to check the downstream installation.
The rainwater gully is not the same as a rainwater tank, a separator for specific pollutants or a safeguard against every backflow of water. It should not be assigned functions that are not confirmed by the documentation. If water returns from an overloaded drain, simply replacing the basket with a larger one may not help. The cause must be sought along the entire section from the roof to the rainwater discharge point.
What should be checked before purchase?
The diameter and shape of the downpipe and the dimensions of the outlet pipe are required. Some covers have prepared locations for adapting the opening, but the range is limited. The compatibility of the specific model should be checked rather than assuming that a universal rainwater gully fits everything. The direction of outflow, access to the seal and the ability to remove the basket after connecting the pipe are also important.
The second issue is the installation location. A component intended for installation by a wall need not be suitable under a car wheel or in a busy walkway. The load-bearing capacity of the housing and the method of its support are specified in the instructions. If the rainwater gully is to be located within a driveway, a solution approved for the relevant loads is required. It is not enough to surround a delicate cover with paving stones and consider it reinforced.
How is the installation height determined?
The level of the cover must be related to the finished surface, not to the temporary level of the ground. Future paving, edging or a gravel layer should be taken into account. The cover must remain accessible and be openable without damaging its surroundings. A component set too deep quickly collects soil, while one protruding too high may be exposed to impacts and create an obstacle when walking.
Before permanent installation, the downpipe should be trial-fitted and the possibility of later removal checked. It should not be stressed in order to reach the opening of a displaced rainwater gully. The connection must be stable but must comply with the operating principles of the system. A change in surface level after the drainage has been installed is one reason why these works should be coordinated with landscaping.

How is the body connected to the pipes?
The method of preparing the opening, seating the seal and stabilising the body is specified in the product instructions. Some models provide for encasement in concrete, while in others the solution may be different. Details from one rainwater gully should not be transferred to every available model. During installation the housing must be protected from deformation and must not be struck with hard tools.
The discharge pipe should be properly supported and laid out in accordance with the drainage design. A pipe suspended on the gully outlet alone may load the connection as the ground settles. Before backfilling, it is worth checking tightness and flow. Photographs of the connections and their locations will help later with any repairs. Elements should not be backfilled until it is known where the water actually drains to.
How do you carry out an operation test?
After installation, residues of mortar, sand and debris are removed from the interior. The basket must be correctly seated and the cover closed without stress. The water flow through the system is then checked. Not only the gully itself should be observed, but also the connection to the pipe and the available point of discharge. Slow drainage may indicate a blockage or incorrect laying of the pipe further away from the building.
A short test does not confirm the capacity of the installation in every rain. It does, however, help to detect connection errors and obvious obstructions. The system should be inspected again after the first heavy rainfall. If water escapes at the top, the cover should not be sealed permanently straight away. First it must be established whether the problem is a full basket, an inadequate discharge, or backflow from a further part of the installation.
How often should the rainwater gully be cleaned?
The frequency depends on the surroundings and the amount of contamination. Where there are trees, inspection in autumn may be needed more often than on an open plot. The contents of the basket are removed rather than pushed further into the pipe. Fine sediment should be flushed out in a manner permitted for the system. Sharp tools that could damage the housing or the seal should not be used.
When servicing the rainwater gully, check that the cover still opens freely and that the surrounding ground has not subsided. Investigate cracks, distorted parts or joints that have slipped apart. Clear the roof gutters as well as the gully so that trapped leaves do not wash into the narrowest part of the drainage system.
7 branches. Materials closer to your project.