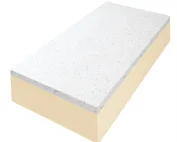
PIR insulation
Thermano Compact in renovation: working in confined spaces
At a glance
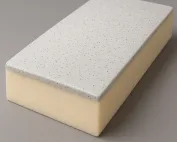
In an occupied building, what matters is the ability to bring the material in and to work between existing elements. Thermano Compact addresses some of these constraints. It does not, however, relieve you of taking measurements and assessing the substrate, which may be uneven or damp. Thermano Compact is a PIR board in the 600 × 1200 mm format, with a multi-layer facing containing aluminium. The smaller format is an important practical feature. During the pre-renovation inspection, check the small working area, into which a 600 × 1200 mm board is easier to bring. The Thermano Compact format must be matched to the size of the working area and the available transport route before determining the scope of demolition and preparing the old partition.
What remains beneath the new layer
A new surface does not solve everything: the convenient handling of a smaller board does not guarantee that the entire installation is correct. Demolition and repair work should make it possible to organise the work on a small section without abandoning the design of the layers and joints. Before the PIR boards cover the old layers, document the dimensions of the installation area, the width of the access and the planned position of every joint.
The source of moisture must be removed beforehand
For a small detail with Thermano Compact, trace the path of moisture protection at the junction with the window, wall or substrate. The board facing does not replace flashings and sealing of the joints. In a confined space, these elements must also fit, and not only the thermal insulation core.
Before covering the existing structure, examine the junction of the small PIR insert with the substrate and flashing in a location exposed to water. The protection of a small section of insulation must also cover its connections to the surrounding material, before the new construction conceals the places important for assessing the cause of the problem. Adding insulation alone does not close the matter when the facing surface may be undamaged and water can still enter through an unsealed side. The polyurethane foam in the finished product does not replace the repair; first the detail together with its terminations must be protected instead of protecting only the middle of the board. After preparing the location, re-check the method of water drainage, the condition of the flashing and the connection of materials on all sides of the insert, instead of basing acceptance on the appearance of the new surface.
Thermano Compact is sometimes considered for a small section requiring additional insulation. Before preparing the cut piece, however, determine the cause of the problem at that location. A cold area may result from a gap in the insulation, but a damp trace may also have another source. Pressing the new board against a soiled surface is not a diagnosis of the defect. The repair should cover the cause and the correct termination of the insert.
Thermal effect after changing the layers
The available cavity determines the thickness limit of Thermano Compact, but the selection also requires the assumed thermal resistance. Calculations for this product are based on the lambda of 0.023 W/(m·K) specified by the manufacturer. Only a comparison of both conditions shows whether the variant under consideration meets the task.
Given the constraints of the existing geometry, consider a narrow insulation strip whose thickness is limited by the existing building detail. The thermal resistance of a small insert should be assessed together with the geometry of the materials surrounding this section, before the limited space forces a change to the designed cross-section. The parameters recorded in the old documentation may not be sufficient, because the influence of the narrow strip on the thermal bridge also depends on the geometry of the materials around it. When comparing what the new polyurethane boards will deliver, assess the benefit of insulating the detail without transferring the R result to the entire junction. To the measurements of the existing condition, add the width and thickness of the insert and the continuity of the thermal insulation in the adjacent sections, and later compare them with the planned cross-section.
Junction between the old and new sections
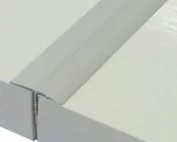
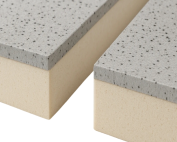
When cutting Thermano Compact, mark which edges are to remain factory edges. The BASIC and TOP variants differ in their finish, and cutting may remove the groove from an edge that is being fitted. The new joint then requires planning; it cannot be assumed that it will retain the geometry of the original profile.
On the sketch of the joint between the old and new parts, include the offcut cut from the TOP board, which loses part of its factory overlap when shortened. After cutting the TOP board, the joint between the retained groove and the new straight edge must be planned also at the junction of the new layer with the elements left in the building. Fitting carried out only on site can be difficult, because using the offcut requires providing support and properly closing the new joint. The sequence of works must be established so that the cutting method is matched to the actual direction in which successive sections are laid. When accepting the section where the new polyurethane insulation ends, assess the position of the groove on each element used and the stability of the resulting strip at the perimeter.
Condition of the structure and requirements for the building envelope
When comparing the thin Thermano Compact variants, keep the division of compression data: up to 30 mm, at least 150 kPa is declared, and from 40 mm, at least 200 kPa at 10% deformation. The reaction of the product itself to fire is E. Thicknesses selected for different details should not automatically receive the same mechanical data.
In the building being renovated, check again the difference between the declared CS150 up to 30 mm and CS200 from 40 mm. The CS value for Thermano Compact should be assigned to the thickness shown on the panel marking even when some of the elements remain from the previous assembly. A change of layers may reveal other constraints, and the appearance of two panels does not show which declaration range each of them belongs to. Before leaving an old element in the assembly, it is worth assessing the pressure on the detail while retaining the data of the precisely selected variant. In the inspection report and in the repair design, retain the thickness on the label, the contact area and the way the anticipated load is distributed.
How to accept the renovated joints
Prepare the Thermano Compact order on the basis of the dimensions of the cut elements. The total area of the recesses may not show the losses, because narrow remnants of the sheet cannot always be used in the next place. A cutting plan makes it easier to link the quantity of panels to the geometry of the details being renovated.
In a renovation estimate for “polyurethane insulation”, analyse a set of several small pieces whose combined square metreage does not show the number of full panels. All the necessary cut pieces should be laid out on the 600 × 1200 mm format before purchasing the packs, and the final scope must be confirmed after identifying the necessary repairs. The existing condition affects the scope of the contract, because narrow remnants may not fit the next place despite the material thickness being the same. Once the layers have been uncovered, waste can be reliably limited by adapting the cutting layout to the actual shapes of the required elements. Before finally ordering the material, confirm the cutting sketch, the number of full panels and the possibility of safely using the remaining pieces with the contractor responsible for preparing the old part.
7 branches. Materials closer to your project.