Insulation and PIR
How do I prepare a quick thermal calculation for a wall and check for moisture?
In brief
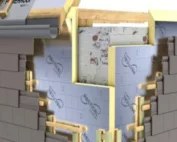
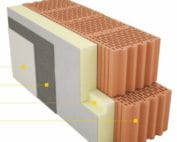
A quick calculator helps compare insulation thicknesses. However, it will not identify damp masonry or a poorly detailed reveal. For the result to be useful, the actual wall and its operating conditions must be described. Heat loss, surface temperature and the risk of moisture within the construction are checked separately. Record the layer build-up from inside to outside. For each layer, give the thickness and thermal properties. In an existing building, do not automatically assume that the wall matches a typical solution from the year of construction. An air cavity, a different type of block or later cladding can change the result.

What data should be measured before calculating?
Also gather information about the room temperature and humidity. A kitchen, a storeroom and a seasonally heated workshop behave differently. For internal insulation, data on the condition of the masonry and the layers of the façade are needed. A sealed external render can restrict drying out, although this difference is not visible in a photograph.
What does a simple thermal resistance calculation tell you?
The resistance of a homogeneous layer is calculated as R = d/λ. The thickness d is entered in metres. For 80 mm of insulation with an assumed lambda of 0.022 W/(m·K), the result is approximately 3.64 m²K/W. This is the resistance of the insulation alone. It is not the U-value of the whole wall, nor confirmation of compliance for the completed building element.
In a simplified calculation, U is the reciprocal of the sum of the layer resistances and the surface resistances. The corrections specific to the construction then have to be taken into account. The appropriate design values for the materials are used for the design. The figure on a single board’s data sheet does not describe every PIR board available on the market.
Why is the wall surface area not enough?
A room may have a favourable wall U-value and still have a cold corner at the ceiling. A floor slab passing through the insulation, a reinforced concrete column and a narrow reveal create different conditions from the middle of the building element. These locations require separate assessment. The averaged result of a layer calculator does not show the temperature at every point.
Mark the perimeter of windows and doors and the junctions with floors on the plan. In a small room, the number of such connections is often large in relation to the wall area. Additional centimetres of insulation therefore cannot replace a good detail. First it must be established how the insulation is to be connected to the adjacent building elements.
How do you separate the two moisture problems?
Surface condensation and moisture inside the wall are separate issues. The first depends, among other things, on the internal surface temperature and the air humidity. The second requires an assessment of vapour flow and the drying capacity of the layers. The absence of visible droplets does not prove that the entire cross-section is dry.
The simplified calculation method has a defined scope. It does not fully describe leaks, capillary transport or every situation with heavy rain on the façade. In a difficult renovation, a more detailed time-dependent analysis may be needed. It is selected according to risk, not according to the expected result.

How should variants be recorded so they can be compared?
Prepare a table with three thicknesses of the same insulation. Keep the wall, conditions of use and finishing system identical. Next to the U-value, record the loss of room area and the reveal detail. This shows whether a small thermal improvement justifies additional centimetres of build-up.
The result should indicate the assumptions, date and version of the solution. Add a cross-section drawing and a list of points requiring separate verification. A printout with a green ‘compliant’ field alone is not sufficient if the board, cladding or sealing method was changed after the calculation.
What should be checked before handing the result over to the construction site?
Compare the calculations with the material specification and details. The thickness on the drawing must match the schedule. Check the space for the finish, services and connections at floor level. Otherwise, the contractor may locally compress the layers or interrupt their continuity.
The calculation is a basis for decision only after an assessment appropriate to the project. With internal insulation, the condition of the existing wall is particularly important. If active dampness is present, its cause must be clarified. Selecting the insulation thickness does not solve a damaged gutter or rising damp.
How can unit errors and uncertain data be spotted?
Check the units before the analysis. Entering 80 instead of 0.08 m gives a seemingly excellent but meaningless resistance. Do not confuse the lambda of the material with the U-value of the finished panel. The first describes heat conduction within the material, the second the flow through a specific building element.
If you do not know the type of old wall, calculate reasonable property variants and indicate that uncertainty. An exploratory opening may be a better investment than optimising thickness to the millimetre based on a wrong assumption. A good tool shortens the calculation, but the quality of the data still depends on the building survey.
Questions before ordering
Can the calculator result be attached directly to the project?
It can serve as a working material. The person responsible for the design should verify the assumptions, the method and the conformity of the result with the actual layer build-up.
Does a lower U-value always mean a lower risk of moisture?
No. Internal insulation can lower the temperature of the old masonry. A safe build-up also requires an assessment of airtightness, vapour flow and drying out.
7 branches. Materials closer to your project.