Installation and workmanship
What is chimney flashing and how does it shed water?
In brief
Chimney flashing is designed to intercept water running down the roof slope and guide it safely around the chimney before discharging it onto the covering. Before installation, establish not only the chimney dimensions and roof pitch but also the condition of its finish and the roof area above the obstruction – these determine the shape of the detail. Check that water has a clear path along the sides and that no section forms a pocket trapping debris. Sealant alone at the top edge will not replace correct geometry.
Why does the chimney interrupt the water path?
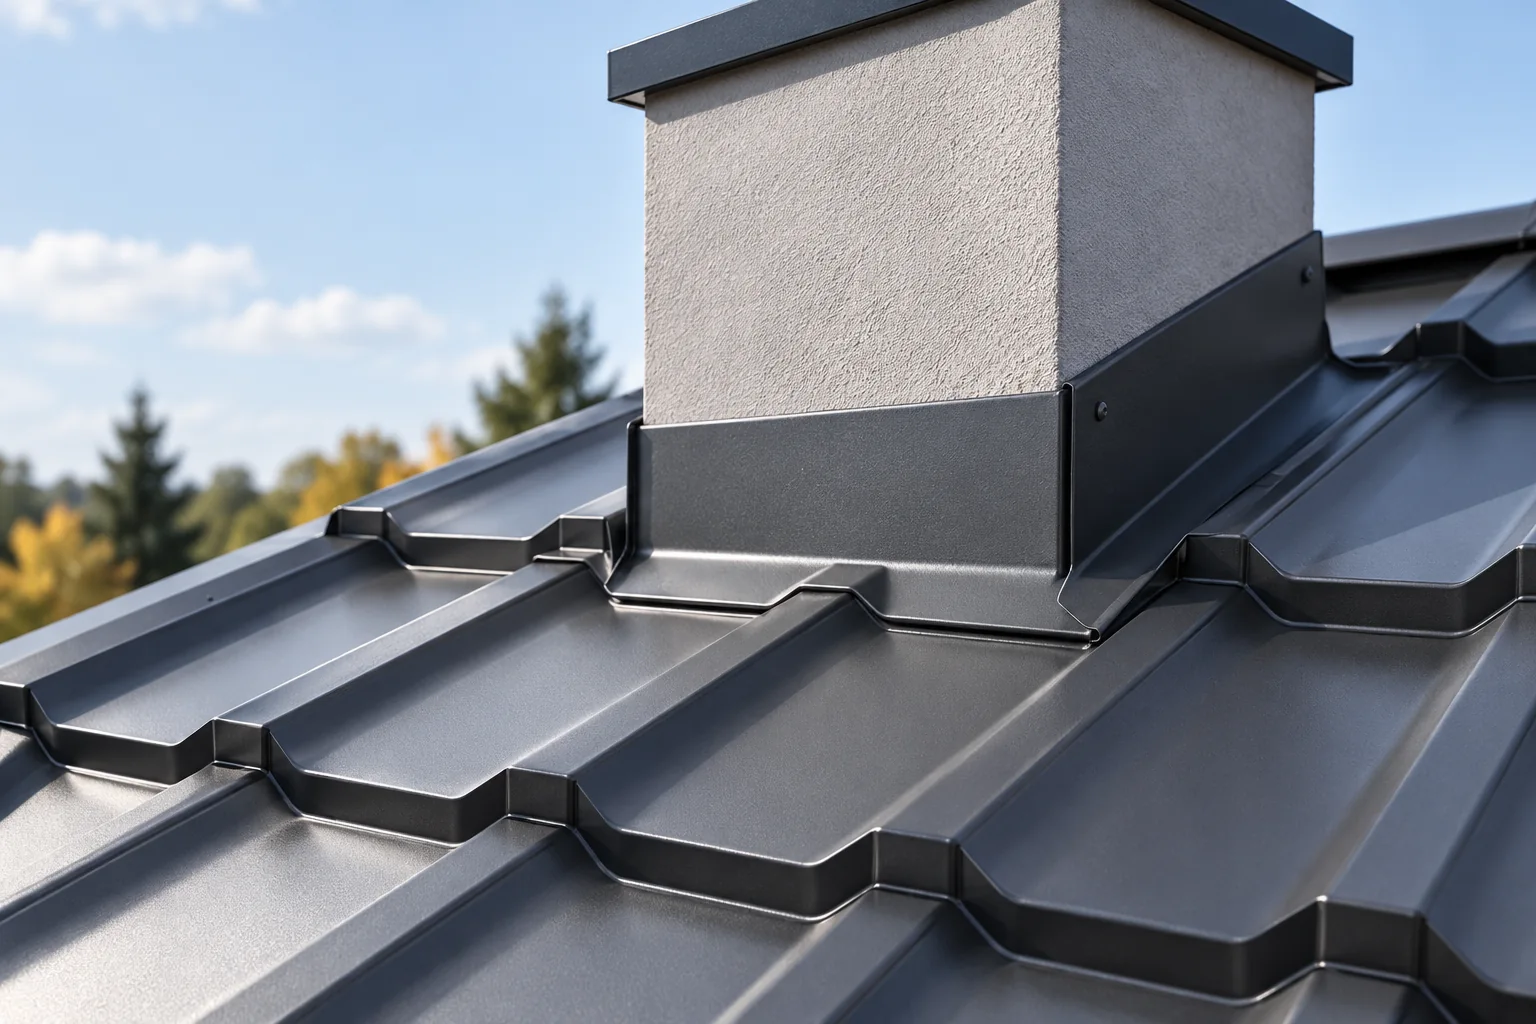
On an ordinary section of the roof slope, water flows according to the profile. At the chimney it must bypass a vertical obstacle. The upper part of the flashing collects this runoff, the sides lead it onward, and the lower part discharges it onto the roofing. Each section should work together with the adjacent one, without a gap or an incorrectly directed lap.
The width of the chimney and the roof area above it are significant. A large obstacle may require a separate solution for dividing the flow. One shape should not be assumed for all dimensions. The detail should show where the water will go during intense rain and whether it has an unobstructed passage at the sides.
What must be established before installing the flashing?
Dimensions, roof slope, type of roofing and chimney finish are needed. Also check its condition. Damaged render or a leak higher up can bring water behind the flashing despite a correct lower connection. In such a case, replacing only the sheets at the roof does not remove the entire cause of the leak.
The chimney and the roof structure may move differently. Therefore the method of fixing must account for movement and a proper separation of functions. Rigidly bonding everything with one thick layer of compound is not a universal solution. It is worth agreeing the detail before covering, when support and the sequence of installation can be planned.
What is the significance of the rear section?
Behind the chimney, viewed from the eaves, water may encounter leaves and other debris. The flashing should ensure drainage without creating an accidental pocket. Proper support is needed. A flimsy section deflecting under load can alter the slope and retain water.
With a wide obstacle, the design may provide a shaping that divides the runoff. Dimensions are not chosen by eye. The roof above, the profile and the possibility of inspection must be taken into account. Too little space at the sides hinders both drainage and the removal of sediment. This is worth checking before cutting the sheets.
How are the sides and the lower section joined?
The side sections must take water from above and pass it on. The method of connection with tile-effect metal roofing differs from the detail at trapezoidal steel sheet or insulated sandwich panel. The heights of the profiles, the position of the laps and the required seals are important. An arbitrary shape should not be transferred between different coverings.
The lower part should direct the runoff onto the roof surface. Its fit must not cause deformation or holes in the wrong place. The seal is to complement the correct geometry. It should not create a barrier behind which water and dirt are retained.

What protects the junction with the chimney?
The upper termination of the flashing at the vertical surface must be made so that water does not penetrate behind the sheet. A solution selected for the substrate and system is used. The adhesion and durability of the sealing materials are important. Dusty or detached plaster will not provide the same connection as a properly prepared surface.
Not every visible crack should be treated as a need to apply another layer of sealant. First, the movement of the joint and the condition of the substrate are assessed. Repeated loss of sealing may indicate a detailing error. The repair should remove the cause instead of only covering the place where water is visible.
What happens beneath the roofing?
The membrane or other designated layer also requires a correct connection at the chimney. Moisture running down it should have a path around the obstacle. The external flashing does not repair material under the sheet that has been cut and left without sealing. These works should be checked before they are covered.
Requirements regarding contact with chimney components must also be maintained. PIR, wood and sealing materials must not be brought arbitrarily close to hot parts. Distances and protection are specified by the chimney documentation and the design. Every free space should not be filled with combustible material to achieve a visually tight contact.
How should the flashing be checked during use?
The inspection covers the connections at the chimney, the laps and the patency of the rear part. It is worth comparing photographs from successive inspections. A new damp patch may indicate a change, but not always the exact point of water entry. In the case of a leak, the elements above and the condition of the attic should also be checked.
Safe access to the chimney should be provided. Walking on random fragments of the covering can cause dents and damage. A well-made flashing remains possible to inspect and clean. Its task is to conduct water permanently, not only to aesthetically cover the gap between the roof and the chimney.
7 branches. Materials closer to your project.