Installation and details
How do you install the panels from measuring the structure to closing the building envelope?
In brief
A good installation pace starts with dimensions that match. A panel will not fix a crooked support or a badly positioned opening. Before delivery, it is therefore worth finalising the measurements and the layout of the building envelope. After that, the work follows the details of the specific system. The sequence below helps prepare the site, though it does not replace the connection design. Measure the support axes, heights and diagonals. Also check the width of the surface on which the panel will be supported. The nominal frame dimension is not always the panel cutting dimension. It is affected by the solutions at the base, corners and top edge.
First, compare the design dimensions with the site
At openings, determine the clear passage width and the size of the frame. A gate needs its own space for tracks and installation. If its edge falls close to the panel lock, check the width of the remaining run. Such a conflict is easier to resolve on the drawing than by randomly cutting the finished wall.
Divide the walls and roof into actual elements
Draw each elevation separately. Mark the start of installation, the direction of the locks, the lengths and the cuts. For the roof, allow for the slope and the preparation of the ends. Wall and roof panels perform different tasks. They cannot be swapped on the basis of a similar core thickness.
In a simple example, a wall width of 8.2 m with a module of 1 m requires nine runs before cutting. This does not mean, however, that a final run of 20 cm is always permissible. The end detail, the fastening and the possibility of spreading the division must be checked. The result of the division alone does not close the design.
Establish the delivery sequence and the storage location
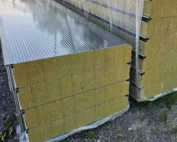
Position the packs so that the nearest stages do not require moving the entire delivery. The substrate and supports under the pack must comply with the storage rules. Protect the material from water, dirt and edge damage. A damp or dented panel requires assessment before use.
On a tight plot, check simultaneously the vehicle outline, the unloading area and the movement of equipment. The strip between the building and the fence may suffice for people but not for turning a long panel. Also plan the collection of packaging so that it does not block access to the next fields.
Prepare the connections that will later be hidden
Before closing up, check the base components, tapes and internal flashings. Their arrangement depends on the documentation for the given solution. The seal at the support and the material in the interlock may have different functions. It is not enough to replace them with a single random strip of foam.
Determine how the seals of the wall, corner and roof will connect. It is precisely at such intersections that continuity is easily broken. Prepare the details of service penetrations before closing the enclosure. Later drilling should not cut through the support or leave the core exposed.

Check the first run and subsequent reference points
Position the first panel relative to the marked axes. Check the verticality or the correct position on the roof slope. Join subsequent elements without damaging the interlocks and coatings. Do not try to recover missing centimetres by tightening the screws harder. The discrepancy must be clarified.
Every few rows, compare the position with the reference line. Check the module, the closing of the joint and the distance to the last edge. It is good practice to measure at both ends of the elements. This makes it possible to notice rotation of the layout that would remain invisible if only one edge were checked.
Select the fastening and the method of making openings
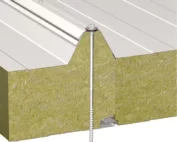
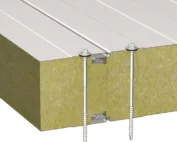
The type and number of fasteners are determined for the loads, the panel and the support. Check the length, the ability to drill through the substrate and the required washers. Tightening should provide a connection without crushing the cladding. An additional layer under the panel may change the required screw dimension.
Make cut-outs with a tool approved for the material. Do not use hot cutting or an angle grinder. Openings require the intended support and flashings. A large cut-out may change the load-bearing capacity of the panel, so it should not be made solely on the basis of the device dimension.
Also inspect places that are difficult to see
Check the wall base, corners, the connection to the roof and the edges of openings. Check water drainage and the completeness of the core closure. Remove swarf and protective film in accordance with the material requirements. The inspection should cover both sides of the enclosure if they are accessible.
Record the position of penetrations and concealed elements. Hand over the cleaning and service access rules to the user. It is also worth indicating where equipment can be mounted later. Hanging it without checking on the cladding alone may change the operating conditions of a correctly executed wall.
Questions before ordering
Can installation begin when some dimensions of the structure are still unknown?
Not in fields dependent on these dimensions. Geometry and details must first be confirmed so that the ordered lengths and connections fit the construction.
Can all seals be assessed once the wall is closed?
Part of it remains hidden. That is why inspection and documentation should be carried out before covering further connections.
7 branches. Materials closer to your project.